GAIA Tool Guide
A guide to setting up and using Grauw's GAIA Tool for PC users.
Setting up Grauw's GAIA Tool
Depending on how you've set up Windows on your PC (eg. using the default OneDrive option), you may not be able to follow these instructions exactly but the changes you'll need to make should be obvious.
Step 1
Download the GAIA Tool from Grauw's website using the link below and save it in your PC's 'Downloads' folder.
Step 2
Using Windows File Explorer create a folder called 'GAIA' in your 'Documents' folder. So that the new folder has the addresss 'C:\Users\Your_User_Name\Documents\GAIA'.
Step 3
Using Windows File Explorer copy the 'gaia-tool-0.4.exe' file from your 'Downloads' folder into the newly created 'GAIA' folder.
Step 4 (optional)
If you're creating a desktop shortcut for the GAIA Tool and want a different desktop icon then you can download my desktop icon file 'GaiaTool.ico' using the link below and save it in the 'GAIA' folder. On clicking the link some browsers will ask you to save the download, on others you will see an image of the icon - just right-click the image and select 'Save as...' and the download will start. Right-click on the desktop shortcut and click on the 'Change Icon' button followed by the 'Browse...' button then locate and open the 'GaiaTool.ico' file in the 'GAIA' folder.
Step 5
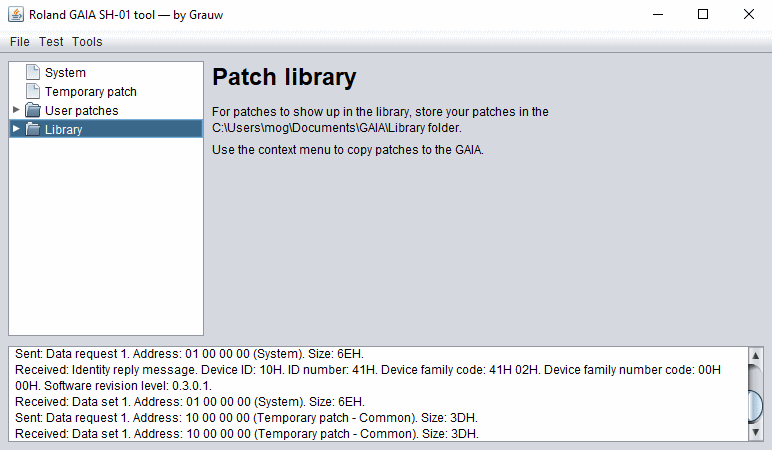
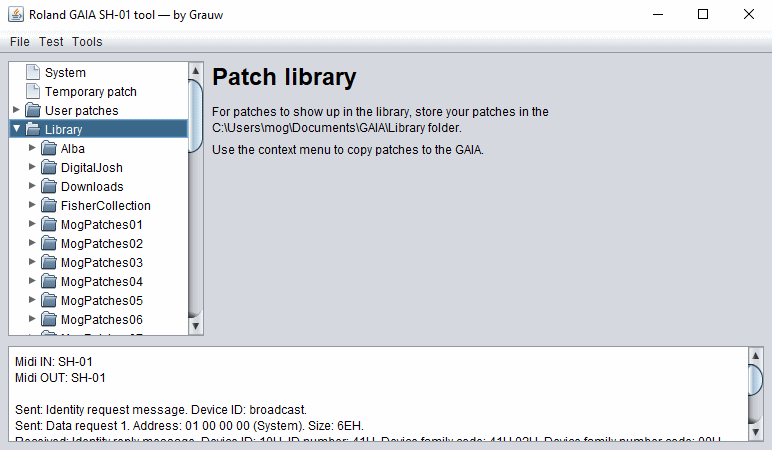
Connect the synth to the PC using a USB cable and power up your GAIA. Open the GAIA Tool (if you do not have Java installed on your PC you will receive a message asking you to install it, follow the instructions to install Java and restart the GAIA Tool). Once the GAIA Tool is open, click the Library option in the left menu and the program will instruct you as to where you need to create a 'Library' folder (usually inside the 'GAIA' folder or in a OneDrive folder).

Step 6
Download and copy MogPatch zip folders and any SVD folders you have into the 'Library' folder. On reopening the GAIA Tool all the patch folders will appear in the left hand frame.

Using Grauw's GAIA Tool
Grauw's GAIA Tool can only transfer patches into the synth's Temporary Patch memory (see Page 17 of the GAIA's Owner Manual for how the GAIA's memory is organised).
Transfer a patch from the library to the synth
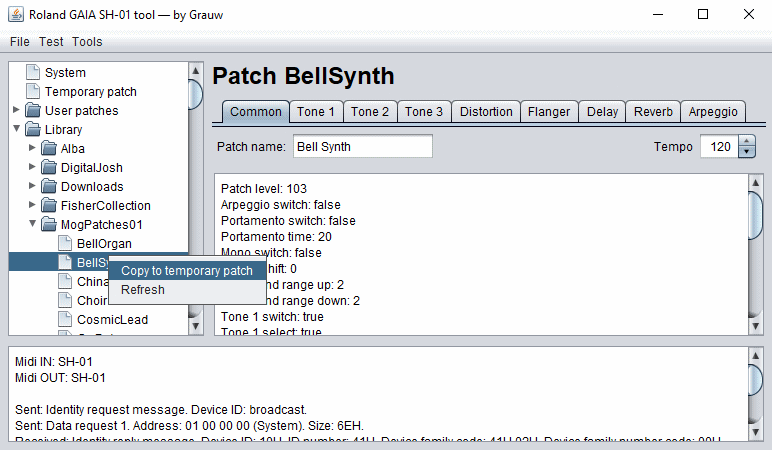
In the GAIA Tool, open the folder and right-click on the patch you wish to transfer to the synth. Select the 'Copy to temporary patch' option. The patch will now play on the synth.

Transfer a newly created patch from the synth to the library
In the GAIA Tool, select 'Temporary patch' in the left-hand menu then select 'File' from the top menu and then 'Save patch as...', open the library folder you want to save the patch in, give the patch a filename and click 'Save'. The patch will then transfer to the library folder.
Other features
Other than the patch library features, the GAIA Tool allows you to:
- Edit arpeggios.
- Edit patch names.
- Change the patch tempo. (Far better than the 'Tap Tempo' method on the synth).
- Use real-time synchronisation between synth and tool (or Save & Reload options if Synch is switched off).
- View synth adjustments in the bottom window. Critical for accurately making pitch changes.
- View current patch settings for and adjustments to tones, distortion, flanger, delay and reverb.